5 Things You Probably Didn’t Know It Could Do In Bricklink Studio
Quite a few people are moving across from Lego Digital Designer or LCad for building their awesome creations and as such, there’s a bit of a learning curve. While Bricklink Studio does come with a handy tutorial to get you started, here are a few functions in the program that I’ve found handy when building. It’s also pretty fun once you get going!
1. Rotating And Moving
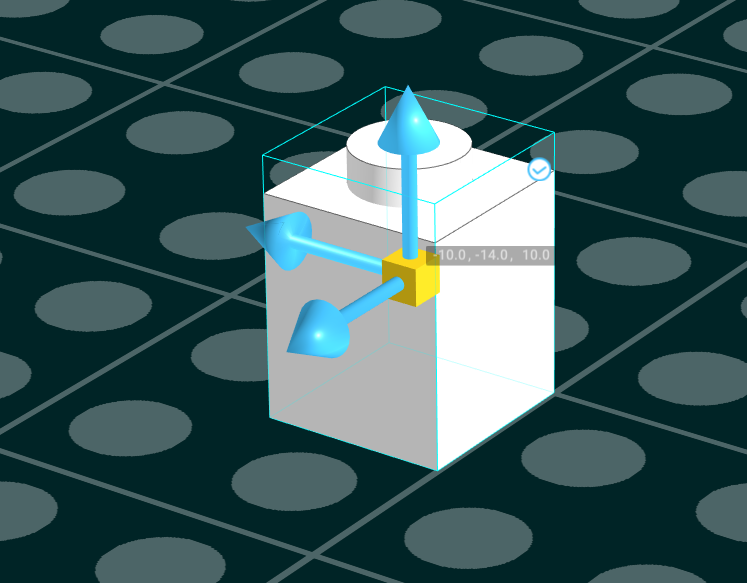
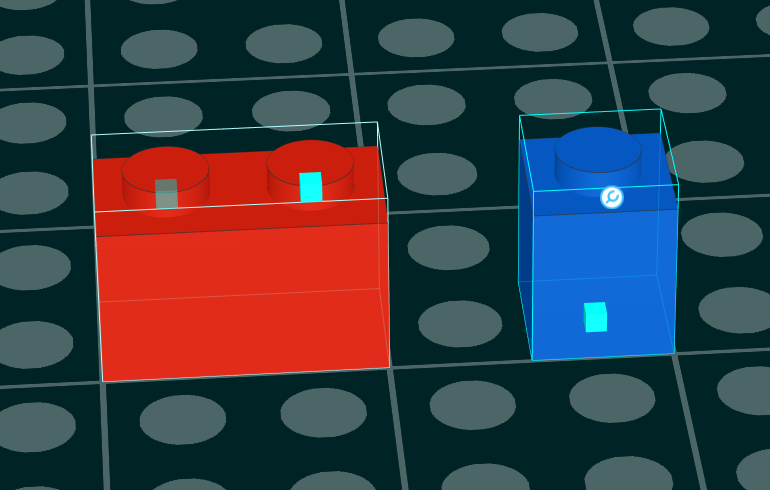
A surprising amount of people had no idea bricks can be freely moved in Studio. One way is to select the brick and use the WSAD keys to nudge it gently in whichever direction. Alternatively, if you press T this opens up the movement controls. If you are wondering what the yellow square is for, this resets the movement orientation if your brick happens to be rotated from its original 90 degrees position. Very handy for moving grouped objects which have a rotated item in there.
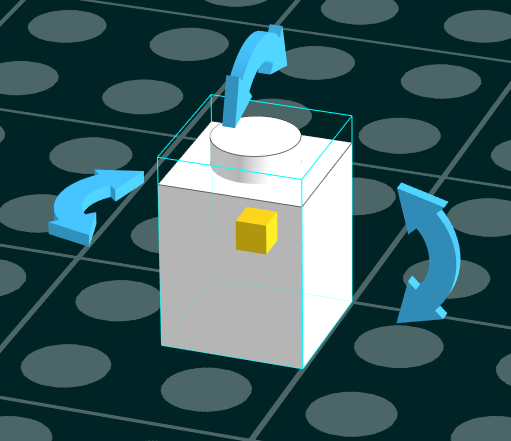
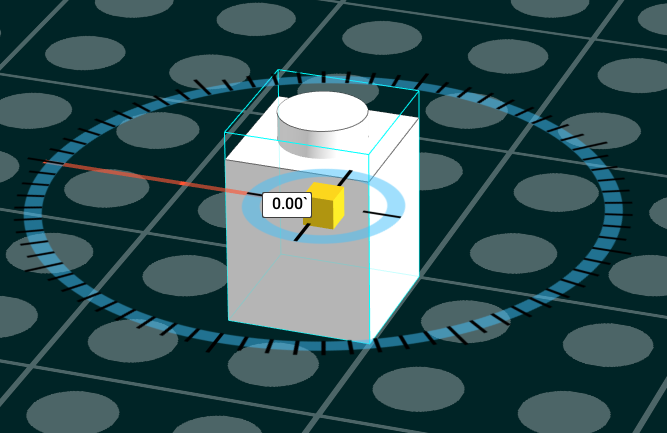
Rotating can be done in a few ways. The quickest is to select a brick then press the arrow keys. This will rotate to right angles. Holding down shift will lock to 45 degrees. If you need to get even more precise then pressing R will open the rotation controls and clicking on a rotation arrow will open the degrees tool where a degree can be typed in or by holding down shift and pressing an arrow will rotate by degree. Cool right?
2. Keeping Focus
If you are building really big models you will likely have noticed that after moving the camera around it begins to get cumbersome with rotating and panning past a certain size, or sometimes you feel like the camera is “stuck” and can’t seem to move in close enough. What is happening is that the program is targeting the dead centre of the workplace as an orbit point. If you are familiar with other 3D software you will know about the ability to change the viewport’s camera’s focus object, Studio can do this. By default, you right-click on a brick and go to “set as origin”. This will lock the camera to that brick. But doing this all the time is a bit of a chore, so in the shortcut preferences under view there is “set as origin”. I personally use F, but this can be any button you like.

This will target the camera to whatever brick you have selected making it easier to focus on things.
If you need to get back to the default simply right-click anywhere in the interface and go to “Reset origin”. Always hand 🙂
3. The Connect Tool

This is something that is right in front of people’s faces but often is neglected as the click and drag snapping tool does a smoother job as it’s more intuitive. This tool is very handy for moving large objects around as Studio’s snapping can bog things down. What happens when you drag an object around with snapping is every stud is checked for a connective point. When used with large objects like a baseplate this will slow things down and makes accurate placement really hard to do as it will snap into anything or any angle. Turning off snap and setting the grid to Plate Height, is one way to minimize excessive snapping slowdown for big models or grouped items, but what if you need to connect to something without all off the fuss of moving things around in such a manner?
The connect tool allows you to do this.
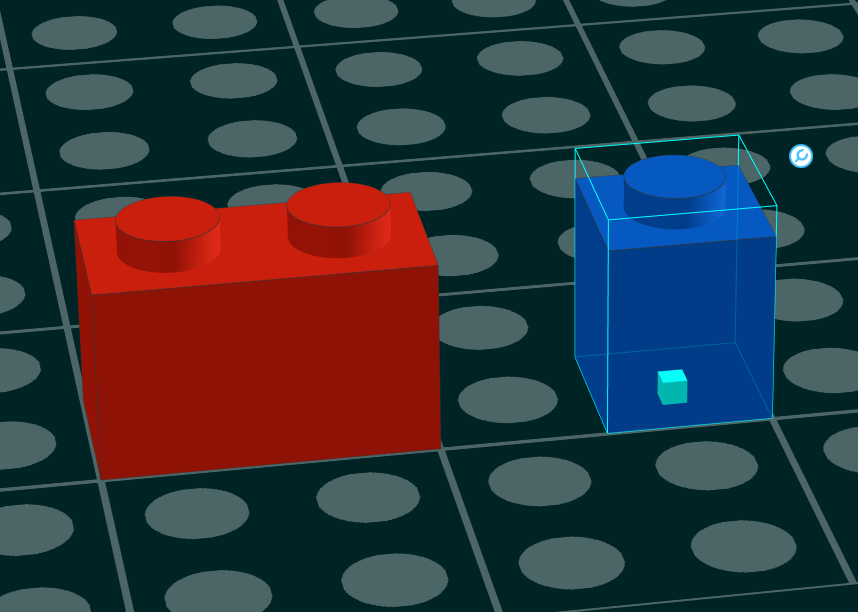
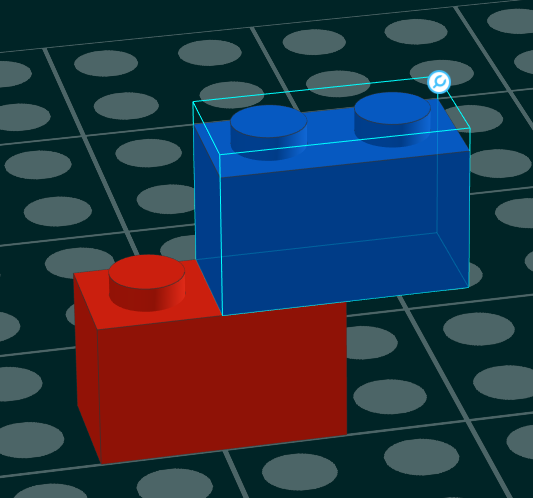
In this example, you use it to connect brick A (blue) to brick B (red). When a brick is selected with the connect tool you will see little square points appear, clicking one on the underside of brick A (blue) will tag this as the point you want to use as a connection. Hover over brick B (red) and you will see the same squares, each square is where the blue brick can connect to and then select. Where you want to link it up. A very handy one!
4. Aligning
Another feature is that bricks can be aligned. This is handy if bricks were placed with snapping turned off or need to align to a particular offset.
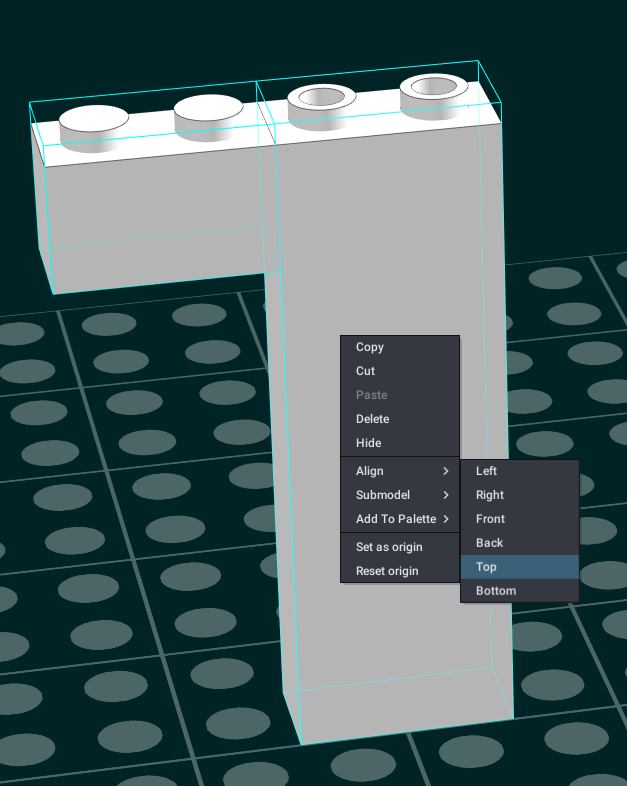
This can also be used to align bricks to the top and bottom of their heights, so if you need a 1×2 to line up with a 1x2x4.
In this example, simply select the bricks you want and right-click on them to go to align and select “top”. A good one to know!
5. Selection Tools
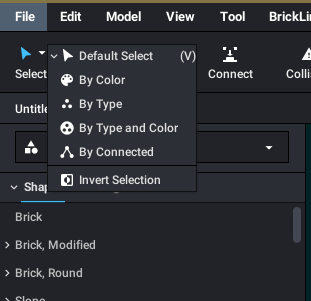
Hidden in the select icon are a few controls that come in handy and can be assigned shortcuts. By Colour allows you to pick any brick that is of a certain colour. This is very handy for quickly reassigning multiple parts into a different colour. By type – is much the same, but will focus on one type of object. By type and colour will combine the two functions. And invert will invert the selection, which can come in handy for deleting or hiding bricks you don’t need quickly.
I hope these quick tips help you with building in Studio 🙂 .
Thank you for reading
Support BrickBanter.com by shopping for your LEGO® via the affiliate links below.
It’ll cost you nothing but will mean the world to us. 🫶
🇦🇺 Australia – 🇨🇦 Canada – 🇪🇺 Europe – 🇬🇧 United Kingdom – 🇺🇸 United States – 💛 Everyone else
Explore more articles